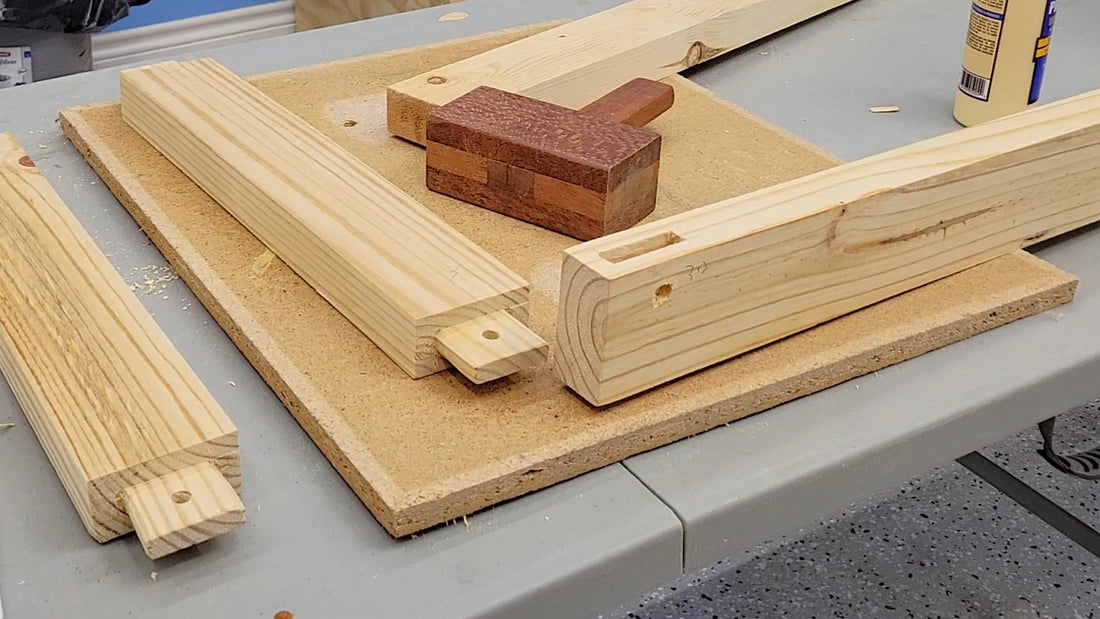
Mortise and tenon joinery is a classic woodworking technique used primarily for its strength and durability, making it ideal in applications where two pieces of wood need to form a strong, stable connection. It dates back thousands of years, the oldest known examples come from ancient Egypt, used in wooden structures and furniture found in tombs.
The joint is made up of two boards, one with a mortise or groove, the other with a tenon or finger that fits into the mortise.
The Two main types of Mortise and Tenon Joints are:
- Through Mortise and Tenon: The tenon passes all the way through the mortise and is visible on the other side. This type is very strong and often used in furniture.
- Blind Mortise and Tenon: The tenon does not pass completely through the wood, so the joint isn’t visible from the outside.
Cutting the Mortis
- Mark the Mortise: Use a marking gauge and/or pencil to mark the mortise’s outline on the wood. Make sure the mortise is centered on the piece and that the width of the mortise matches your desired tenon’s thickness.

- Drill Out Excess Wood (Optional): To speed up the process, use a drill to remove most of the wood inside the mortise outline. Drill multiple holes along the length of the mortise, being careful to stay within the lines.

- Chisel Out the Mortise: Use a chisel and mallet to cut the mortise to its final size. Start by chiseling the areas furthest from your final dimension lines, working gradually to the lines.
- If cutting a Through Mortise, do not chisel all the way through from one side. Go halfway from each side to keep the size as accurate as possible.
- Check the depth on a Blind Mortise regularly to ensure it’s consistent. Your ending depth should ¼” deeper than the expected depth of your Tenon to keep from having any fitment issues.
Cutting the Tenon
- Mark the Tenon: Use the same marking gauge and/or pencil to mark the tenon. The tenon should fit snugly into the mortise, so it’s usually slightly smaller than the mortise width (about 1/64 inch for a snug fit). Mark both shoulders and cheeks of the tenon.
- Saw the Shoulders: Cut the shoulders on all sides, which are the horizontal cuts across the wood’s width. Saw carefully along the marked lines to ensure the tenon’s joint against the board with the mortise is tight.

- Saw the Cheeks: Turn the piece to saw the cheeks on all sides, which are the vertical cuts that define the tenon’s thickness. Saw carefully along the marked lines to ensure the tenon’s size is precise.

- Test Fit and Adjust: Test the tenon in the mortise. If it’s too tight, pare down the tenon with a chisel until it fits snugly. Avoid over-cutting, as a loose joint will weaken the connection.
Simple Options for Assembling the Joint
- Glue and Pressure: Glue and clamps can be used to attach the joint but often this is only applicable in smaller joints where clamps are big enough to apply pressure
- Glue and Tenon Wedges (Through Mortise and Tenon Joints Only): Cut a relief in the tenon and create wedges from your scrap to glue and hammer into place. Then flush cut the tenon wedge to give a smooth outer surface for final finishing prep.


- Glue and Dowels: Used for larger assemblies, dowels can be cut down to length to be used as pins through the Mortise and Tenon to lock the joint in place.
- Offsetting the hole on the tenon slightly toward the shoulder, so that when it is assembled and the dowel is hammered through, it can pull the joint tight.


Tips for Accuracy
- When using dowels, chamfer the end being hit through the hole to make it easier to travel through.
- Measure and mark carefully, as accuracy is crucial for a tight joint.
- Test-fit as you go, especially when chiseling or sawing, to ensure the parts fit well.
- Take your time; mortise and tenon joints are most durable when fitted precisely.

